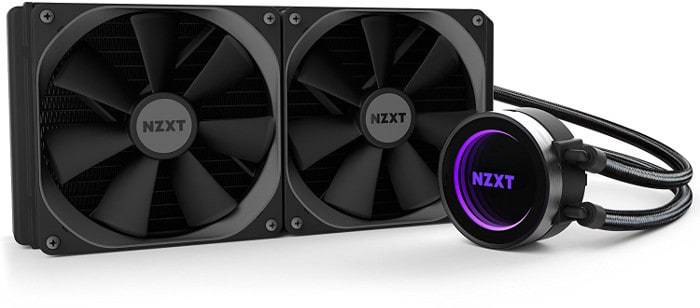
Liquid cooling is a great way to keep your gaming PC running cool quiet, especially during intensive gaming sessions. And Liquid CPU Cooler also much more effective than traditional air-cooling fans.
So, in this guide I’ll be covering how to correctly install an all in one liquid CPU cooler, like the Corsair H100i for example.
Contents
- Parts of a liquid cooler explained
- Choosing the right model for your case
- Starting the installation
- Attaching the fans
- Attaching the block & pump unit
Parts of a liquid CPU cooler explained
There are only 3 main parts to most modern [simplified] liquid CPU coolers, those are the block and pump unit which fits over your CPU.
The two connecting tubes, which enable the coolant to flow in a continuous loop, and the rectangular radiator section, which the fans screw into before the whole thing is attached to your case.

Choosing the right model for your case
There are a few vital points to note here, first you must select a model which is compatible with your motherboards CPU socket type, or the block & pump might not fit.
Secondly you need to be sure that the radiator section will fit in your case, length and width ways. The most common lengths for these radiator sections are 120 millimeters, 140 mms, 240 mms and 280 mms. So, you’ll obviously need a longer case for the lengthier versions.
It’s also worth pointing out that if the radiator section is 38 millimeters thick, and the fans which attach onto it are 25 millimeters thick, you’ll need a total clearance space of 65 millimeters in the upper section of your case. So always measure in millimeters before buying.

Starting the installation
Ok, so you’ve chosen a quality liquid CPU cooler which ticks all your boxes, and you’ve got it laid out in front of you with your PC open, where to begin?
First install the back plate to the outer side of your motherboard. This is easy, but you might need to adjust the mounting holes to get the perfect fit. [Some models won’t require a back plate, but will just attach to the motherboards inner side via 4 stand offs]
Once your back plate is snug go around to the inside and tighten the back plate down using the included fittings.
Attaching the fans
Next, we need to screw the fans onto the underside of the Radiator, the fans have arrows engraved into their outer rim, so you know which way to align them for correct airflow.
Just screw your fans into place on the radiator then you’re ready to attach said radiator to your case.
Then head around back and screw into place with the included screws and washers.
Attaching the block & pump unit
Now we’re ready to install the block & pump unit, which [usually] has thermal paste pre-applied, so just align the block over the CPU area then tighten down with the thumbscrews.
Next plug in the 4-pin power cable to the CPU fan header on the motherboard. This connection has different locations on different motherboards, but, is usually located above your installed CPU.
Lastly, plug in the Link Data cable [if your cooler has one] which allows the cooler to report to the desktop software, so you can adjust / monitor fan speeds, temperatures and other data. And that’s it, your cooler is fully installed, and you now have a nice quiet liquid cooled gaming system that’s ready to go.
Thanks for reading, and feel free to share this article if You found it helpful. Beside this you can check out color full Liquid CPU cooler to buy Online.


