4K monitors for 4k gaming PC with fast response times are becoming more affordable, but, upgrading is not just grabbing a new monitor and expecting the best gaming experience right away.
And unless you already have cutting edge hardware, it’s unlikely that you’ll be running modern games at 4K without making big changes.
1 of 3 solutions arise, run at native resolution with reduced frame rates [because 4K is 4 times as many pixels as 1080 P] Or run at a lower res and deal with the glitches that exist when running a monitor at anything other than its native res . . Or . . . Upgrade. So! prepare your cash and your mind for this 4K gaming PC build 2023.
Contents for 4k Gaming PC Build 2023
- Pre build
- My CPU choice
- RAM Memory
- The case
- The motherboard
- The power supply unit
- SSD Drives
- Dual graphics cards
- CPU Cooler
- Cable management
- Choosing a 4 K monitor
- Booting up safely
Pre build
Start with a static free work station, and all you need for assembly is a multi bit screw driver, and some needle nosed pliers.
Before starting, plug in all the components and power the system up outside of the case. To ensure everything works while it’s easy to reach.
My CPU choice
With new titles and Direct X 12 games coming in 2015 it’s a good time to choose a CPU that supports more threads.
I chose Intel’s Core i7 4930 K, it has plenty of PCI express lanes for high bandwidth graphics cards, and supports 64 gigabytes of DDR 3 memory with 8 gigabyte DIM’s. It’s also Intel’s least expensive 6 core – 12 thread CPU, and for this build I wanted the extra cores.
To install it into the CPU socket area lift both retention arms, one on each side, then lift the hold down plate.

Align the CPU by matching the corner of your CPU [which has a small gold triangle] with the triangle corner on the socket, then insert gently, ensuring that the little plastic nubbins in the socket align with those on the CPU. The whole process should not require any force.
Next, lower the hold down plate, and lower the retention arm that locks it down, then lower the second retention arm, and the cover will pop off.
RAM Memory
I’ve chosen G-Skill’s Ripjaws-Z DDR3 2,400 megahertz RAM, because high speed memory is getting cheaper, and some games benefit from it. I also added an extra 32 gigabytes for content creators who need the extra oomph.

To install, find the color matched slots on your motherboard, and open the retention clips on both sides, use the slots furthest from the CPU socket for cooler air flow.
Align each RAM stick according to the plastic nub in the slot, and the notch in its underside, then slot in and push down gently until the retention clips pop back into place.
Repeat for the second slot on this side, then move to the other side and insert the others.

These four matched RAM sticks provide great extra memory bandwidth.
The case
The Corsair 760 T ATX gaming case is perfect for this build, thanks to its spacious interior, good air flow and sleek look. It’s available in black or white from Amazon UK

Lift both side panels of, and we’re going to replace the included fans later with some Bitfenix spectre pro fans, so now’s the best time to remove pre installed ones. Press on the front fan filter to pop it of, undo the 4 screws holding these fans, then place them aside.
Next, remove the screws on the back fan, which we’re going to replace now. Align the fan with the 3 pin lead coming out as close to the motherboard tray as you can, then put the empty vibration mounts that come with the fan in like so . .
And screw it in place.
The motherboard
The motherboard is a tricky choice, because there are useful features that matter, and then there are others that are just fluff.
However, this choice was made simpler because Asus only released three motherboards that are optimized for Intel’s Ivy – Bridge E LGA 2011 CPU’s. And only one of the 3 is affordable, so the X 79 Deluxe it is . .

It’s got everything covered, like AC Wifi, multi graphics support, strong CPU and RAM overclocking support, automated fan control, and strong build quality.
To install you’ll need the I / O sheild, the board itself, Wifi antenna’s, two straight ended SATA cables, the two way SLI bridge, and the manual.
Align the I / O shield in the back of your case, then press on the 4 corners until they snap home. Corsair pre-installs the motherboard stand off’s in their cases, so just poke the back of the motherboard through the I / O shield then lower it into place.
Corsair also replaces the threads of the stand of with a post, which holds the motherboard in place, while you tighten the 8 perimeter screws that secure it properly.
For the front panel I / O, power and reset are not affected by orientation, so just check the spots for them in the motherboard manual and plug them in. The power and drive activity LED’s do need the positive pin to correspond to the correct wire, so if they don’t work at first just switch them around until they do. Don’t worry, you won’t damage anything.
The front USB 3 only goes in one way, while front USB 2 and Audio are a bit trickier. Look closely for the blocked of pin on each one . .
And match it to the missing pin on the header . .
The wire for the rear fan that we installed earlier can be managed by looping it around the fan frame and plugging it into the closest fan header. Don’t worry that they’re 4 pin fan headers on the board, as 3 pin connections work fine.
The power supply unit
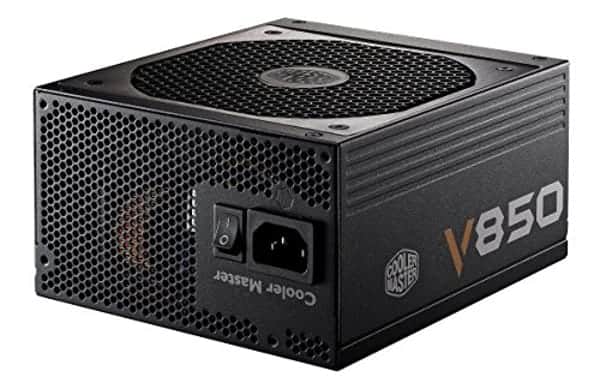
For this build I’ve chosen the Cooler Master gold rated – full modular power supply unit.
Because it has solid efficiency, good cables on a modular interface, has excellent ripple suppression, and it’s one of the rare PSU’s that has no negative points in its design. And 850 Watts will be enough for this rig.
We’re using a modular power supply, so we don’t need to worry about cables right away, just slide the PSU into position, fan side down, at the bottom rear of the case. Then use the 4 screws included in the box to secure it.

Next grab the 24 pin cable, the 8 pin EPS cable, 2 PCI Express power cables, 2 SATA power cables, and a 4 pin molex cable. This will be enough to power the whole system.
Plug the 24 pin, and 8 pin EPS connectors into your motherboard . .
Then route them behind the motherboard tray through the nearest holes. Put the other cables aside for connecting later.
SSD Drives
I’ve chosen a couple of Intel 730 series SSD’s because in raid zero they give better performance, but, feel free to go with cheaper SSD drives if needed.
Our Corsair case includes handy spring loaded SSD mounts in the front, near the right side panel, so just snap them into place.

Now route the SATA cables neatly to the motherboard, and then double check the manual to ensure that you’re using a SATA 3 six gigabit per second connector.
Then grab a SATA power cable from earlier and carefully plug it into both drives, without putting unneeded tension on the cable, and run it to your power supply unit.
Dual graphics cards
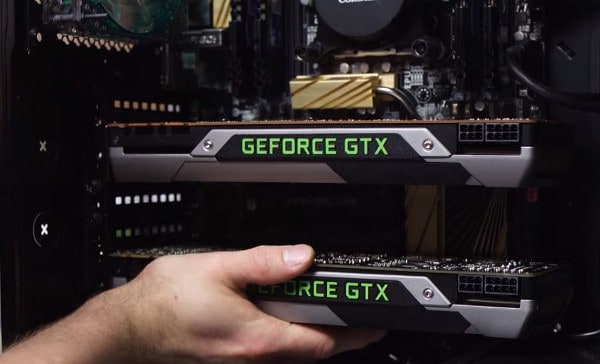
My chosen cards are two GTX 780 Ti’s, and why only 2 cards, some of you may ask. I’m not sold on 3 and 4 way configurations, because the scaling doesn’t justify the extra cost, heat and power consumption.
This dual card configuration will run today’s demanding games at high settings on 4 K, and while I can compare screen shots and tell the difference between high and ultra . . When the game is in motion it’s not that easy to distinguish, so I’m not going to burn more cash for a few extra notches.

To install the cards remove 2 PCI slot covers, in line with the 2 PCI Express 16 X slots on your motherboard.
Then position each card over its PCI Express slot, and once aligned, firmly push it into place.
Replace the screws that you took out of the slot covers, then grab those PCI E power cables from before, and plug them into your cards before running them around the back of the motherboard to the power supply unit.
Join your cards with the SLI bridge and that’s that.
CPU Cooler
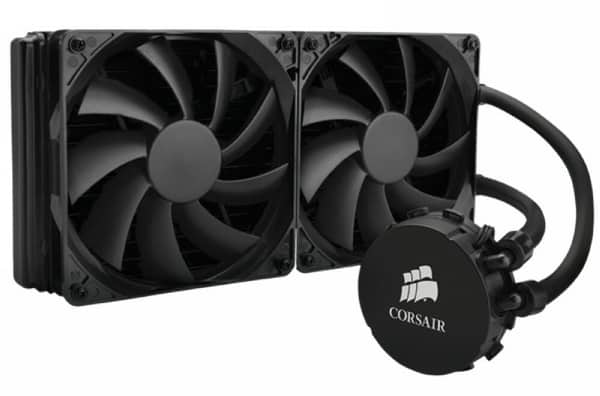
The thing I like about the H110 CPU cooler from Corsair, is that unlike other all in one liquid coolers it is purely performance oriented. You give up better mounting and software control compared to other options, but our 6 core CPU needs all the help it can get. Especially if you scheme to overclock.
So I chose this cooler, and positioned it over the front intake fans, this has 2 effects. First it allows the CPU to be cooled by nice fresh air coming in the front, and secondly it lets me leave the top of the PC case in place, which keeps the dust out.
To install, start by locating the correct mounting parts for LGA 2011 in the box. If you’ve got good eyes you can do this pretty easily by looking for the ones with the more coarse threading, but, if unsure check the manual.

Align the plastic fillers so the hole is closer to the outside of the bracket, and put the screws through . .
And in place . .
The cooler includes thermal compounds so you won’t need to add any, all you need to do is secure the hold down plate with the included plastic ring, then screw in all 4 of the mounting holes into the back plate that’s included on all LGA 2011 boards.
We’ll need to clear space at the front of the case by removing the 3.5 inch drive cage, its holding screws are underneath, undo them and remove by hand.

You can remove the second cage to, because thanks to the dual SSD drives you won’t need it.
Next, position the front 140 mm fan using the long screws included with your radiator, then position the radiator behind the fans and fasten all screws home. This can be tricky so going slow will help.
Plug the fan connectors into the nearest ports available on the motherboard, then, plug the pump connector on the CPU block into the CPU header on your motherboard.
Cable management
Moving onto some last minute cable management, it’s just a matter of laying everything down flat enough so you can close the side panels without any interference. Something that’s a little bit more difficult on this case, due to that plexi back panel, that will easily flex and bow outwards if you have to many cables bunched together.
The good news is there is a decent amount of space if you use it well, have a look at my cable management guide for a complete how to. [link]
Choosing a 4 K monitor
Obviously, you are going to need a 4 K monitor, and unfortunately there aren’t a ton of options yet. Until recently for a high quality, color accurate 4 K monitor the PQ 321 Q, selling for a stupidly high price, was pretty much all there was.
But Samsung have released a value priced 4 K monitor, the Samsung U28D590D [who thinks up the short catchy names?] and even more recently Asus released their PB287Q [really?] 28 inch 4K Monitor, so there are at least a few affordable options when choosing a 4 K monitor. I’ll be reviewing both of these soon in the gaming screens section.
Booting up safely
Press delete while booting up the system for the first time, this gets you into the UEFI BIOS, select LOAD OPTIMIZED DEFAULTS to get everything set up.
Change your memory to XMP MODE, set your fans to QUIET MODE one at a time, then configure your on board SATA controller to RAID MODE.
And that’s the basics, but there’s lots of other stuff in here you can tweak at your own discretion.
Now just press f10 to reboot, then press Ctrl-I when prompted to configure your 2 drives in raid. Raid 0 gives maximum speed with all default settings. After this just install your Windows operating system and you’ll be good to go. If you need to know the reason for building a gaming pc check it out.


